Susan Penny

Home Blog

Newbie Denman tutor joins Mary Berry, Linda Barker and May Martin

0

You know how autumn has that tingling anticipation? New term, new school shoes, new timetable… As October approached, I have been ticking off days before my first ever stint as tutor of the How to Cover a Traditional Lampshade course at the Women’s Institute’s flagship centre of education, Denman College.

Denman was founded in 1948 in an era of optimism and new independence for women by the National Federation of Women’s Institutes at the elegant Oxfordshire 17th century manor house, Marcham Park. Its purpose was to “assist us to do the things we want to do…read books, enjoy music, grow flowers or vegetables well, decorate a house, do needlework, bring up children, and understand engines or the stars, or the laws of health and much else.”

Today it’s pretty much doing the same, offering day schools and residential courses to WI members and non-members alike in craft, cookery and lifestyle. Denman’s tutors include some of the best in their fields: food writer (and TV chef) Mary Berry, interior designer (and TV personality) Linda Barker and the BBC’s British Sewing Bee’s May Martin. And now me…
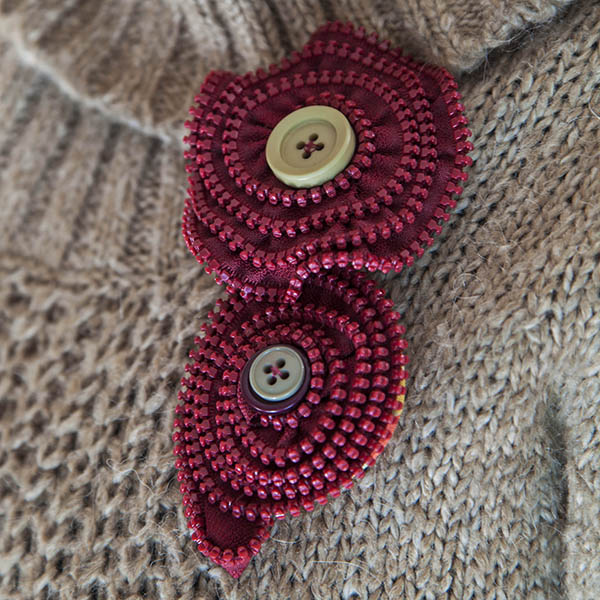
Make a zip brooch!

0

ZipsredSusan Penny makes 2 simple brooches with an old zip
balh de blah in here
Find the project here


Upcycle an old zip into a flower brooch

0

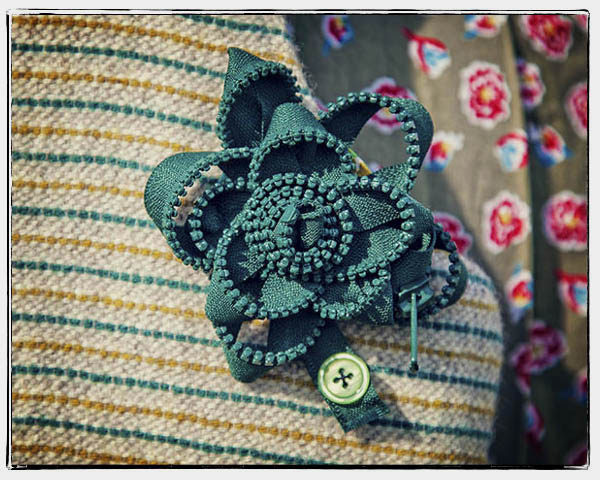
Greenzipper
Susan Penny upcycles an old zipper into a figure of eight flower brooch

You will need:

28inch (Heavy duty closed-end zipper) – mine was plastic
5cm (2in) diameter circle of card from brooch back
Fabric to cover card circle – 8cm (3in) diameter
Brooch pin
Small button
Needle and thread

This is what you do:

1 Move the zipper pull down the zip until it is about 5cm (2in) from the bottom.

2. Make figures of eight with one half of the zip, leaving the zip end exposed at the beginning. Using small neat stitches, sew the layers together at the centre as you make the eights.  When you get to the zipper pull at the bottom of the zip, include this in one of the loops, stitching the rough ends at the bottom of the zipper to the centre point.

3. Continue with the other half of the zipper, making each eight slightly smaller than the last. When you get to the last 10cm (4in) of the zipper, twist it around and around to form the centre of the flower, and secure with stitches at the centre.

4. Sew a small button onto the exposed zipper end.

5. To make the brooch back, sew a row of running stitches around the edge of the fabric circle. Wrap the fabric around the card circle and pull up the thread before fastening securely.

6. Place the covered card circle onto the back of the figure of eight flower brooch so that all the workings are hidden. With small, neat stitches attach the covered card to the flower zipper, then stitch the brooch pin centrally to the back.

These jars are a gift…

0

This weekend I have put together a couple of gift ideas that look really pretty, yet will cost you next-to-nothing to make. The jar on the left contains material scraps, buttons, pins, needles and a couple reels of thread. It could be given to anyone interested in sewing, and even a child if packed with care. The jar on the right contains an assortment of paper cupcake cases in various sizes. Both would look lovely displayed on a dresser. To make a filled jar first wash and dry a jam jar and lid. Next, cut a circle from fabric using pinking shears – I draw around a tea plate slightly bigger than my jar lid. Fill the jar then screw on the lid. Place the fabric circle over the lid and secure with a rubber band. Tie bakers twine or fabric securely around the jar to cover the band. String together several vintage buttons onto a length of thread and attach with a few stitches to the fabric at the top. Add a tag, which can be decorated like mine with ribbon – I have used a cup cake ribbon and a ‘Made with Love’ charm, a scissor charm and a vintage Singer sewing machine charm, which are all available from our Etsy Shop https://www.etsy.com/uk/shop/susanpennyhandmade.

Sweet Pea Help

0

I have been having trouble with my sweet peas this year…I’m not sure if it’s the monsoon conditions we have been having, or the fact that according to Helen Yemm the gardening writer, they should have been planted last autumn. I have never been organised, particularly when it comes to gardening, and so my sweet peas, small and slightly battered from the rain, have not yet managed to wrap themselves around my lovely new cane wigwam. Given that we are in June, I decided to make something to cover the emptiness left by my relucatant sweet peas. This bunting idea is very quick, and because you make it in small lengths, it can be assembled bit-by-bit as you find suitable fabric. First, buy a long boot lace, mine was 2 metres. These are readily available from shoe menders, and can be bought in a range of colours. Next, cut triangles from fabric using pinking shears – each triangle should be about 17cm across the base and 17cm high, measuring up the middle. Lay the boot lace flat on a table and then space the triangles evenly across the lace. Pin, then using a sewing machine, stitch along the length of the lace securing the triangles in place. Voila!..wrapped around the canes I have instant beauty and I am happy to wait for my sweet peas to gradually work their way up. You will find lots of stitching and knitting projects at https://susanpenny.contentmanagement.se/ and at https://www.etsy.com/uk/shop/susanpennyhandmade. Look forward to seeing you there.

0

[vc_row][vc_column width=”1/1″][/vc_column][/vc_row]

Lemon and Elderflower Drizzle Picnic Cake with Stork

0

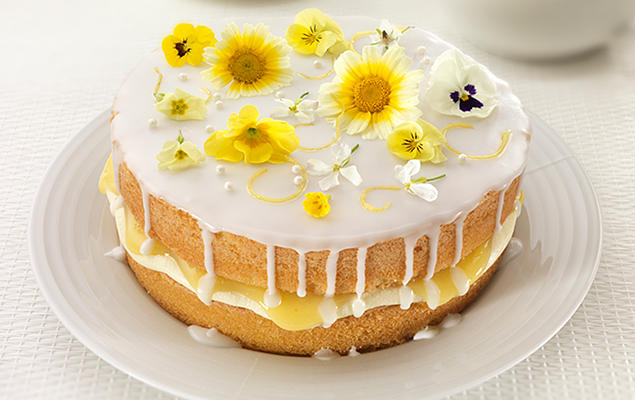
Lemon-and-Elderflower-Drizzle-Cake_recipe_mainA picnic would not be complete without cake, and so this yummy creation, decorated with flowers, is great to take on a summer outing. The cake will serve 12, and the fresh taste of lemon curd mixed with elderflower cordial is sure to be a big hit with everyone. It’s important to use Stork in this recipe, as the softness of the margarine will give your cake a great texture and rise. I would love to pass this recipe off as my own, but I actually found it on the Stork website, where there is a wealth of great baking recipes for you to try.

Ingredients

Cake:
175g (6 oz) self raising flour
½ level teaspoon baking powder
175g (6 oz) Stork margarine
175g (6 oz) caster sugar
3 medium eggs
1 tbs elderflower cordial
Finely grated zest of 1 lemon

Syrup:
Juice of 1 lemon
1 tablespoon elderflower cordial
55g (2 oz) caster sugar

Filling:
115g (4 oz) icing sugar
40g (1 ½ oz) Stork
1-2 teaspoons elderflower cordial
3-4 tablespoons lemon curd
55g (2 oz) icing sugar for glace icing

Method:
1. Sift the flour and baking powder into a large mixing bowl, add the remaining cake ingredients and beat with a wooden spoon until smooth.
2. Spoon the mixture into two greased and base lined 20cm cake tins.
3. Bake in a preheated oven at 180°C, 160°C fan oven, Gas 4 for 30-40 minutes or until cooked. Turn out on to a wire tray.
4. Put the lemon juice, elderflower and sugar in a saucepan and heat gently until the sugar has dissolved.
5. Whilst cake is warm, make a few deep holes with a skewer and drizzle the syrup over so that it soaks into the cake.
6. Place the icing sugar, Stork and elderflower in a bowl and mix well until smooth. Split the cakes horizontally in half. Spread the base cake half with 1/3 of the icing and 1/3 lemon curd. Top with the second cake and repeat layers until the icing and curd are used up and finishing with the final layer of cake on top.
Decorate with a thin glace icing made with the icing sugar and a little lemon juice and drizzled over the top of the cake. Finish with edible flowers.

CrossStitcher

It’s that spooktacular time of year again! Yes, it’s time to stitch our spellbinding Halloween sampler – complete with mini bead spiders!

CrossStitcher is published 13 times a year, available in both print and digital formats – fully compatible with computers and tablets. If you’d like to subscribe, go to the Warners page here, or to checkout the full content of the latest issue go here.

If you’re looking for the chart for Susan’s new Spotlight project on spider’s webs, you can find it all here.

Special offer from Willow Fabrics

0

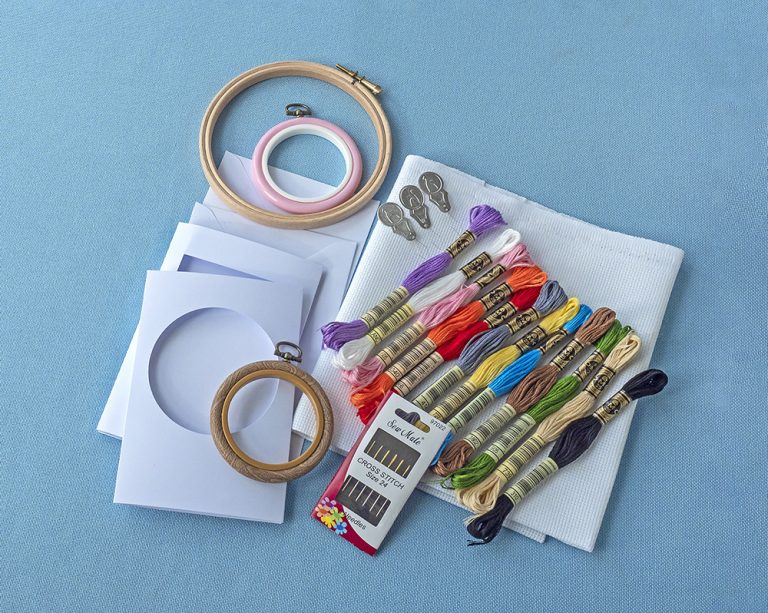
Stuck indoors? You need an emergency stitching pack! Find this offer here