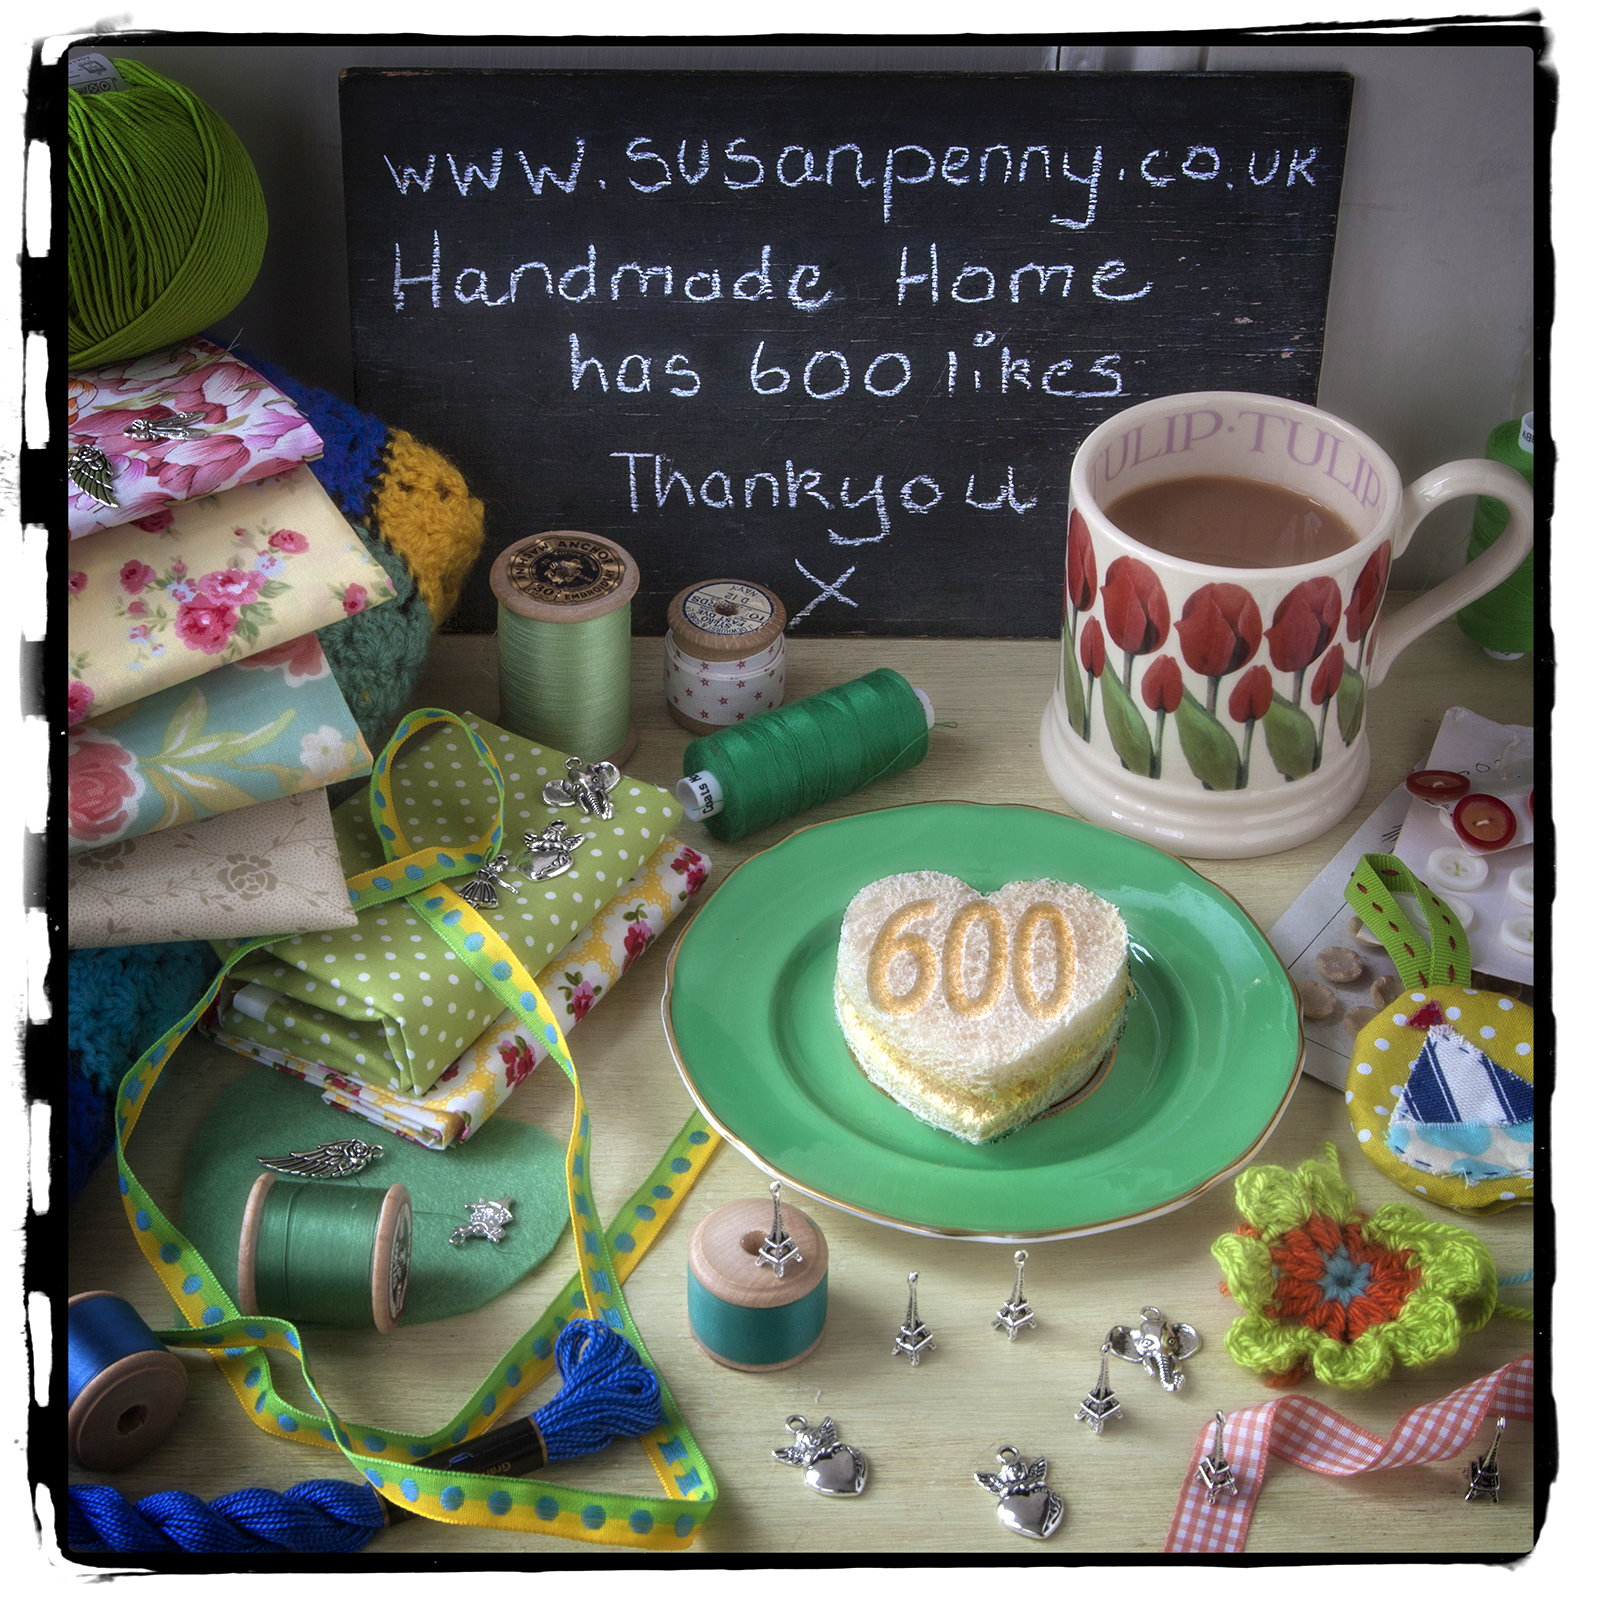
Thank you SO much for all the lovely new likes on our Facebook page.
We have reached an amazing 600…you are all brilliant! Please share our posts and spread the word further, so that even more people can get the FREE patterns and advice on Handmade Home. We took this picture today, as the sun was streaming in through our kitchen window. The lovely silver charms in the picture will soon be available from the Handmade Home shop and on ETSY. I have fallen in love with the Eiffel Tower charm (a reminder of a wonderful weekend spent in Paris before the children). They are great for jewellery making, scrapbooking and on stitching projects. We will have lots of other charms plus craft supplies available in the shop soon, so look out for more news shortly.
Haven’t liked our page yet? Do it here
Thanks to all our Facebook Likers

How to make a Peter Pan Collar for a t shirt

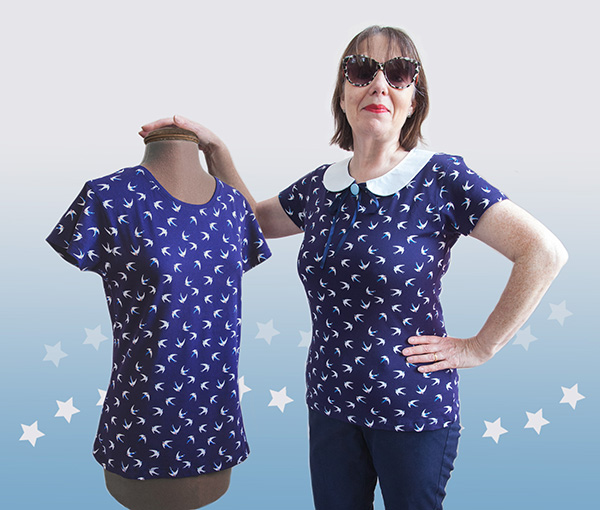
Susan Penny finds a bargain top, and adds a new collar in a few simple steps.
I have always loved the idea of remodeling an item of clothing into another more useful item of clothing. So, last week when I found this rather lovely t shirt in Primark, costing just £3, I snapped it up rather than brave the queue for the changing rooms. This I find is always a mistake! The colour was great, as was the cute bluebird pattern, but whatever brooch or scarf I tried at the neckline, I felt it needed a bit of tweaking!
In my ‘things I have loved, but can’t bare to throw away drawer’, I have a baggy camisole top that I wore in the 80s. I still look at it and go hot and cold when I imagine how it must of looked on me. The fabric is fabby: a fine white cotton with just a little stiffness, that with a little bit of work would make a great collar for my t shirt. I have decided not to show you the camisole in it’s entirety, for fear you might cast judgement on my fashion sense.
So, with the bits I’m never going to show you cut from the top, the fabric pressed and the t shirt washed and checked for colourfastness,
I will show you how to make a Peter Pan collar to fit your t shirt. Find the full project here

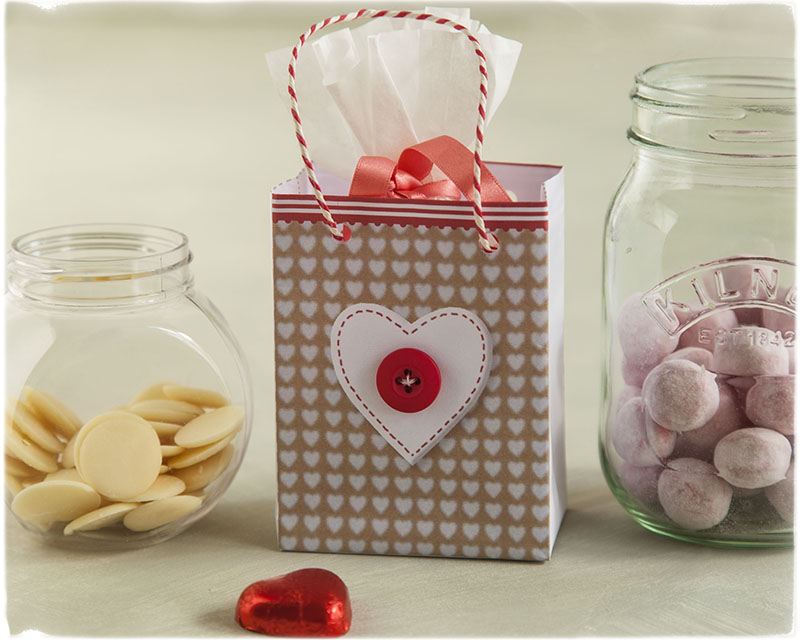
Valentine’s Day Special…

If you have just remembered what day it is tomorrow, why not make this pretty gift bag using our FREE download, and fill it with sweets and treats for your children or loved one.
Download and full instructions here.
This Little Piggy in Cross Stitch

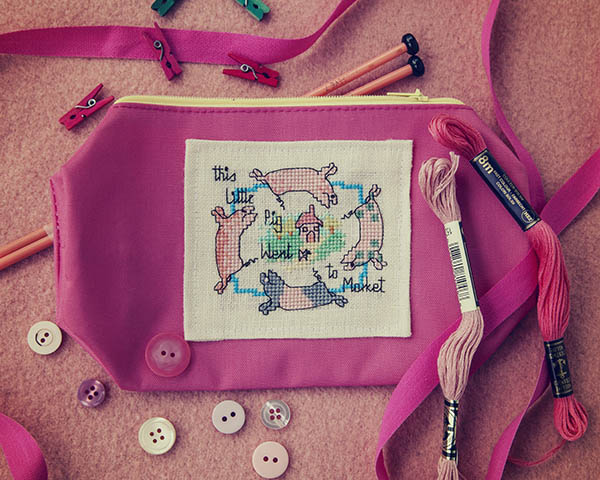
Susan Penny has designed this pretty cross stitch nursery rhyme for attaching to a bag, purse or pencil case
I think we can all remember our parents telling us ‘This little Piggy’ when we were young. For most, it brings back memories of cuddles with mum or dad, feeling safe and loved, and laughing as you wait in anticipation for the ‘tickle’ at the end. My children used to shout, again! again! and this would continue until both were exhausted with laughter. There seems to be very little written about the origins of the rhyme, which was first published in 1760 in The Famous Tommy Thumb’s Little Story Book. The rhyme is counted on a person’s toe, normally a child, and each line corresponds to a different toe, started with the big toe and ending with the little. A foot tickle is usually added during the ‘Wee…all the way home’ line.
I have taken the first line of the rhyme and designed a pretty cross stitch panel, which I have added to a plain pink pencil case. The edges of the evenweave were turned over before machine stitching it to the side of the case.
This little piggy went to market,
This little piggy stayed home,
This little piggy had roast beef,
This little piggy had none,
And this little piggy cried wee wee wee all the way home.
Learn how to line a basket with fabric

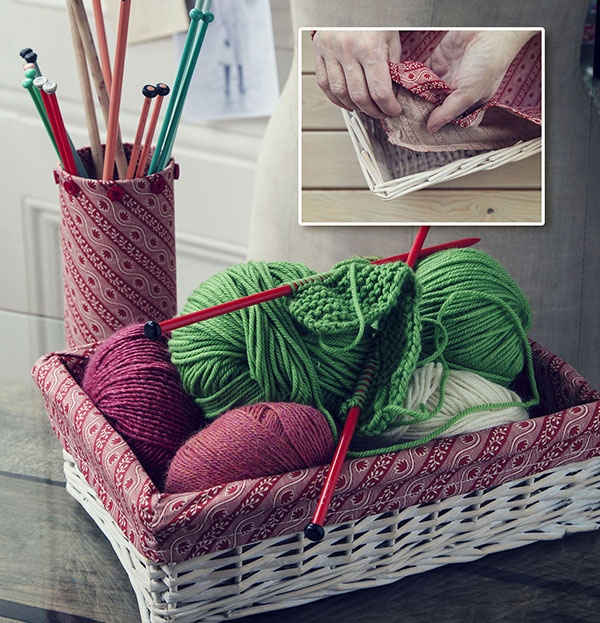
Susan Penny shows you how to make a co-ordinated storage set
With just a few days to go before I occupy my new work space, I have been thinking about how I can organise my fabric and wool. I have bought baskets, but have been worried that the rough inside may snag the fibres. So, I have worked out a way of lining the baskets, which is simple to do and will cost very little. This method can be used on almost any basket but you will need to make a paper pattern (newspaper is fine), of the inside shape to get a snug fit. I used a tape to roughly measure the inside, and then drew the sides, which get larger at the top, and the base onto paper. Make the pattern fit the basket exactly, and then when you draw the pattern shapes onto fabric, add a seam allowance. Extend each of the side pattern pieces upwards, to allow for the turn over at the top and the top seam. Cut out the pattern pieces and place them inside the basket to check the fit – now is the time to reduce or extend the pattern. Once you are happy that the pattern fits snugly, lay on to the fabric and cut out adding the seam allowance. Machine stitch the side pieces together, and then machine stitch the sides to the base – there is no need to neaten the seams as they will be hidden. Try the lining inside the basket, and if you are happy with the fit, turn over the top edge twice and then machine stitch in place. Place the lining in the basket again, which should be a good, tight fit.
I made the needle tub from a Pringles pot covered in the same fabric. Measure the pot, adding extra at the sides for turning; a fold over and seam turning at the top; and enough fabric to cover the bottom of the tube. Cut the rectangle from fabric, then turn over the top and bottom edges, before machine stitching in place. With right sides together, sew up the side seam. Turn to the right side and then pull over the tube. Run a gathering stitch around the bottom edge of the fabric tube, and then pull up to cover the base. Secure the thread firmly. Push the extra fabric at the top down inside the tube, and then decorate with buttons at the top.
This method can be used for almost any shape or style of basket, is a great money saver, and will add personal creativity to your workroom
A Little Valentine’s Gift

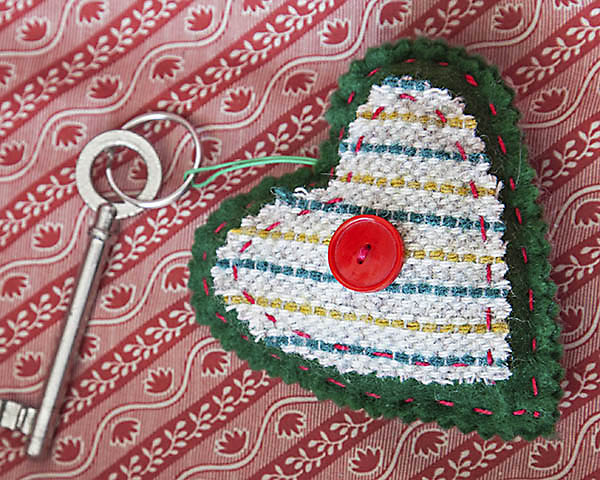
Looking for a project to stitch with the kids as a Valentine’s Day gift? Susan Penny has designed this pretty key fob just for you.
I wanted to design something that our youngest daughter could make and give her dad on Valentine’s Day. I have never really been into mass-produced cards, and have always felt that something hand-crafted, even if a few scribbles on a scrap of paper, is more of a treasure than something shop-bought. My love of stitching came from my mum’s patient teaching, and I now try to encourage my own children in the same way. Stitching from an early age will give children skills that will last a lifetime, but it is important that the projects they tackle are at the correct skill level for the child’s ability or they will get frustrated and give in before anything has been achieved. So, this pretty little key fob will be stitched again, with my help, by our youngest, hopefully giving her a sense of achievement and a great gift for Valentine’s Day.
Download the project instructions here.

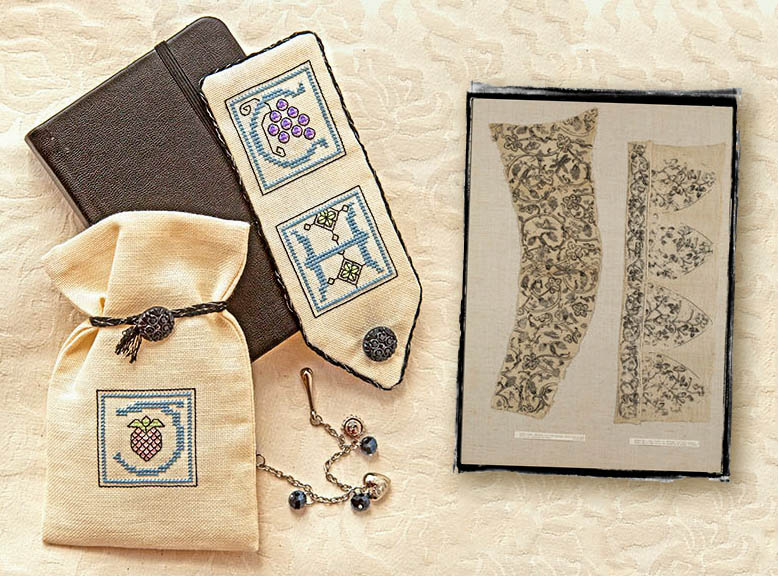
Elizabethan Cross Stitch Alphabet

Whilst helping my daughter with research for a school project, I was once again reminded of the wonderfully skilled stitching found on clothing of the Elizabethan period.
This sleeve panel (above right), which can be found in the V&A collection, is made using tailoring methods of the 17th century, where the sleeves are made in two pieces. You can see the under sleeve, which is probably one section of a woman’s jacket, and although the tailoring is probably a little later than Elizabethan, the embroidery technique called blackwork, is very reminiscent of Elizabethan work. Made by a very accomplished needlewoman, the blackwork, on linen fabric, is made up of tiny black running stitches, which mimic woodblock prints of the time. The designs were usually stitched in a single silk colour, mainly black, but sometimes in blue, red or, green. This unfinished sleeve panel depicts insects, grasshoppers, dragonflies, butterflies, moths, caterpillars and beetles, all which were popular nature images for blackwork of that period, on both men’s and woman’s clothing and accessories such as handkerchiefs, coifs, caps, shirts and smocks.
My cross stitch alphabet is worked on fine linen, and features twenty six Elizabethan style letters, surrounded by nature images which I have outlined in black thread. I made a simple bookmark and bag with three of the letters, but they would make great personalised cards or tags, or you could stitch the complete alphabet and display it framed.